WWII Archives:Multimedia Guide
From WWII Archives
Welcome to the WWII Archives Multimedia Guide! This guide is intended to lay out the rules, advice, and regulations for uploading and managing files on the WWII Archives. Before you begin to upload or digitize anything please read this Guide.
Scanning and digitizing
Which scanner to use?
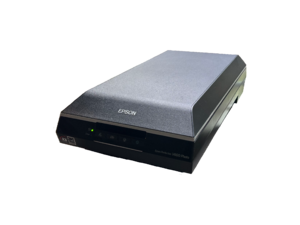
- When scanning any document, photograph, etc, if possible use a flatbed scanner instead of a printer scanner which are lower in quality.
- If not try to find a place that can professionally digitally scan for you.
- If you have neither of these options, you may use a printer scanner
Clean scanner before you scan, and have a clean area around it
- Before and every few scans, please ensure that there aren't hairs, smudges, dust, or anything else on the scanning glass while scanning, otherwise it will show up on scan.
- Try using a can of compressed air to spray every few scans.
- Keep a clean space around the scanning area, no food or drinks at all, and do not be eating or drinking in the process either.
- Try to also wear gloves (such as Latex gloves) when handling scannable material.
Set resolution/DPI
- While scanning, the lowest resolution you should go is 800 dpi. Anything below 800 isn't acceptable.
- 1600 is acceptable if necessary, and only go to 4200 if absolutely needed.
Scan every part
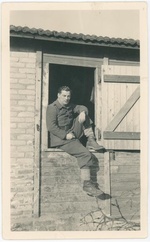
- On any kind of scan, the goal is to scan the whole document, photo, item, etc as much as possible. That means the entirety of the object must be viewable on the scan file.
- Therefore every scan should have the background of the scanner or surface the object is on (if using a camera) be viewable in the scan to ensure all of the object is scanned.
- Also, SCAN ALL SIDES, even if the other side is blank and doesn't have anything on it, scan it anyways.
Do not scan documents, photos, and other objects on top of one another
Unless if absolutely necessary, do not scan/digitize things that are on top of each other, like a photograph on top of a document. Scan each thing individually. This is unless if some things are supposed to attach to one another, then you can do while attached together, and also each thing individually.
Shining a light through the document
Some documents and things reveal something when shone a light through, such as a seal. So to capture it, unless if there is a possible way you can do it with a scanner, find a light and camera in a dark area with no other light and capture the light shining through.
Do not modify scanned files
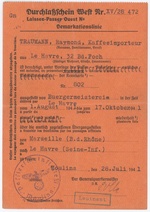
- DO NOT MODIFY SCANNED FILES BEFORE, AFTER, OR WHILE DIGITIZING. Neither the color or other settings in photoshop or any kind of editor. Just save the original files, put them in a pdf (as later instructed) and then upload
- Unfortunately right now a future side-by-side upload may be created with a "corrected image" but not for now.
- As for Negatives, you may scan the original negative, front and back, and then create a copy of both where you turn it into a positive. Then on the pdf the originals will go first and then the positives.
Color cards
- Since many scanners don't capture the exact color, you may put a color to indicate the original coloring in real life as a separate scan for that particular scanner, and then put it among one of the scan pdfs in your collection. However still do not modify the original scans.
- However it isn't required to have a correction card.
Saving the scanned files
- When saving a scan or digitization, save as .tif or .tiff. If you can't .png
- DO NOT SAVE AS JPG OR JPEG, as JPEG/JPG will decompress every time it is transferred. Therefore avoid it as much as possible
Combining scans into PDF files
- For every scan for each document and such, you will combine the scans into one pdf file. For example one photograph will have two pages/files for front and back.
- However you cannot just use any way to convert files into pdf, since some ways will just paste it on a white page for each pdf page instead of just the file.
- The following are the different ways to convert scans properly to pdf:
Mac OS
For Mac OS, there isn't a complete tutorial on the method of creating a pdf that is required. But in any case here are some videos: https://www.youtube.com/watch?v=bnHjzbmEr4o https://www.youtube.com/watch?v=Hf0kI8leZ-8
Here are the steps:
- Either select all of the images or just one you are turning into a pdf and click on it.
- Click on the dropdown in between the red, yellow, and green dots, and the title of the image file(s)
- click on "Thumbnails"
- If you had selected all the files selected before you opened them in Preview, then you don't need to do steps 2 and 3.
- Select all of the files on the left side (in the Thumbnails section)
- Go to the top of your screen, click on "File", then click on "Export..." or "Export the selected images"
- If there is a dropdown to convert to different file types, then select PDF, otherwise there shouldn't be any selection, and you choose the folder to put your pdf, and click on "Save"
- Then go to the folder you placed the pdfs, and there should be a pdf file of each scan in there. Click on the front scan, go to "Thumbnails" again, and drag the other pdf files from the folder into the side bar. You will then position them in the correct order, and then Command+S to save.
Note that while doing this there are some metadata/information about the file (not the actual image just information about it so its fine) that is lost, that you will need to indicate as presented in the section about adding metadata/information.
Windows
Here is the tutorial for Windows: https://www.youtube.com/watch?v=aNmh9T6WbUE
Adobe Acrobat
Here is a tutorial on how to do it in Adobe Acrobat: https://www.youtube.com/watch?v=k7LsOMt3kNQ
Filming, taking photos, etc
What device to use
- If filmming an interview or something else, ideally use a camcorder, digital camera, or phone (unless if its bad quality then find something else).
- For interviews, it is advised to buy a microphone and charger (if your battery will run out mid-interview)
Digitization with cameras
- When digitizing without a scanner but with a camera, do not use some sort of scanning app on your phone or anything like that."
- You will be using a specific setup to properly digitize photos, either with a camera or a phone camera.
- Pick the best quality camera that you have. Then attach it to some overarching attachment that attaches to a flat surface where you will digitize and the camera is directly facing down. Then get at least one or two white lights and some white background. Turn off all the lights around to make the room dark, and start digitizing
- Note down the exact equipment that you used, the different camera settings, software, etc, etc, etc to be noted down for the extra metadata.
- If you would like also use a color correction card as mentioned.
.MOV and HEIC file format
- On Apple devices, videos are saved as the .MOV file format and images .HEIC format. These aren't viewable on the WWII Archives in those formats for now. Unless if you don't care for playing or seeing the video/image, for .MOV file formats it is better to convert it to mp4, and for images PNG or TIF (In most cases you will put it in a pdf format anyways).
Uploading
Places to upload
- To upload, use Special:UploadWizard. If there is something wrong, then you may used Special:Upload which doesn't work as well.
Uploading to the Internet Archive for things over 1 Gb in size
- If uploading something 1 Gb or over, for now you can't upload the file onto the WWII Archives. Instead you will have to upload it to Archive.org (which runs the [Wayback Machine|web.archive.org]). Just sign up and upload
- After uploading, put a link to the related article and collection category on the WWII Archives, and vice versa.
Setting the license and ownership
- In most cases, you will choose the "This file isn't my work", as you can indicate who the author(s) is and where it was sourced from.
- Anything that can't be indicated while doing this will go into the description
- Then choose the licensing of the file or find out what it is, such as public domain, etc.
Categories
- Every file must go into a category. First and foremost is. Then you will create or add to an existing category for the collection that file was part of.
- Then you will count each object/document in order of the collection within a box, binder, folder, etc etc et. From front to back, top to bottom etc. Once you have counted the order of all the documents, then while uploading set their names to the number of order that they are in, and then the name of the file, such as "57 - Letter from John Smith to his parents 3 March 1944".
Managing uploaded files
Adding metadata/information not shown or lost in the file
- As mentioned, when converting any file you loose the original metadata. To undo this put the Template:Multimedia_data at the bottom before the Categories, indicating date, time, location, dpi resolution, scanner/camera/device, software used, whether scanned vertically and flipped, etc, etc. If there was something that can't be indicated on that template note it in the description.
Indicating dimensions/size
- It is required to get the full dimensions of the object being scanned/taken a photo of.
- Per the rules of the site, the object will be measured in metric (cm, mm, etc). If you absolutely cannot use metric then use imperial instead.
- Do not use the dimensions indicated on the scanning software as that usually is not the actual dimensions but for printing.
Other description
- After uploading, it is required that you put a description about the file.
- On most files you will have writing that you will have to transcribe and/or translate. Use the template "Single language document quote" for english only and "Double language document quote" for other languages and translating into english (other language and then english second).
Uploading new versions of a file
- If there was an error in the original upload or you have a better scan, you may need to delete and/or upload a new version.
- Any changes should be indicated in the file page description
Adding files to articles and other pages
In order to add files to articles/pages, consult the following page on MediaWiki on how to do so: https://www.mediawiki.org/wiki/Help:Images
